

Electrical equipment is at the heart of our homes and businesses, and when something goes wrong, it can disrupt everything from lighting to life-supporting systems. Whether you're a seasoned electrician or a proactive homeowner, understanding the basics of electrical troubleshooting can save time, money, and even lives.
Here's a practical guide to identifying and solving issues with electrical equipment safely and efficiently.
1. Start With Safety
Before touching any electrical device, always prioritize safety:
-
Turn off the power at the breaker panel.
-
Use insulated tools and wear rubber-soled shoes.
-
Verify de-energization with a voltage tester.
-
Never work alone on high-voltage systems.
If you're unsure or uncomfortable, it's best to consult a licensed electrician.
2. Understand the Equipment
Take a moment to review the equipment manual or wiring diagram. Knowing the intended operation of the device will help you identify abnormalities. Ask:
-
What is this equipment supposed to do?
-
What are the normal voltages, currents, or behaviors?
-
Are there diagnostic LEDs, beeps, or fault codes?
Sometimes, understanding the "normal" is half the battle.
3. Identify the Symptoms
Good troubleshooting begins with a clear understanding of the problem. Is the device:
-
Not powering on?
-
Overheating?
-
Tripping a breaker?
-
Making unusual noises or emitting smells?
Write down all symptoms and when they occur. This helps narrow down the likely causes.
4. Perform a Visual Inspection
Many electrical problems have visible clues:
-
Burnt components or scorch marks
-
Loose wires or connections
-
Signs of moisture or corrosion
-
Swollen capacitors or damaged insulation
Tighten any loose terminals and replace any visibly damaged components.
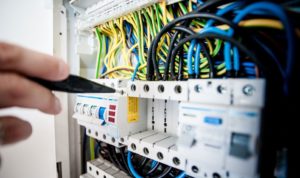
5. Test Methodically
Using a multimeter, test the following in order:
-
Power Source – Is the outlet or circuit delivering power?
-
Continuity – Are internal fuses, wires, and connections intact?
-
Components – Check resistors, capacitors, relays, switches, etc.
Always test with the equipment off and unplugged, unless voltage readings are required.
6. Replace or Repair
Once the faulty part is identified:
-
Replace blown fuses with the correct rating.
-
Repair bad solder joints or replace burned-out switches.
-
If the part is proprietary or complex, contact the manufacturer or a technician.
Keep in mind that repeated failures may signal a deeper issue (like a voltage surge or improper installation).
7. Retest and Monitor
Once repairs are made:
-
Restore power and verify functionality.
-
Monitor the device for abnormal behavior over the next few hours or days.
-
Keep records of the issue and what was done—this can help spot patterns or future problems.
Conclusion: Know When to Call the Pros
Basic troubleshooting can resolve many common electrical problems, but some jobs are best left to professionals—especially if they involve high-voltage systems, complex electronics, or critical infrastructure.
If you're repeatedly facing the same issue or dealing with unfamiliar equipment, contact a licensed electrician. It's better to invest in a safe solution than risk damage or injury.


This is interesting